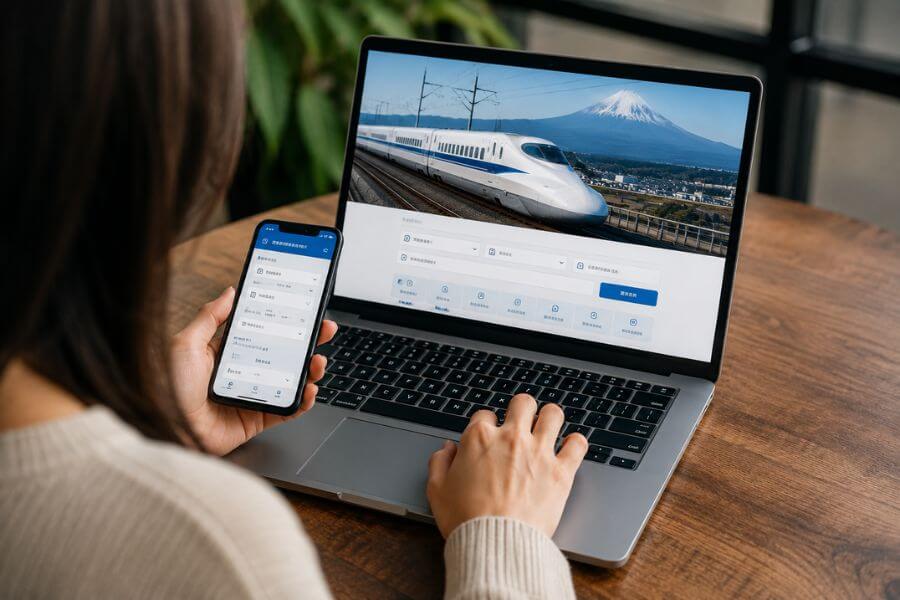
Key Takeaways
- Book Ahead for Peace of Mind: Securing your high-speed rail seats before you leave home saves you from long lines and sold-out trains once you arrive.
- Credit Card Preparation: Use a card that features advanced online security approval to prevent the system from blocking your transaction.
- Luggage Rules Matter: Large suitcases require specific seat choices, so selecting the right ticket option keeps you from paying extra fees at the platform.
- Easy Digital Entry: You can use a smartphone barcode or link your purchase to a local transit card to pass through the station gates without needing paper tickets.
- Flexible Travel Schedules: The online platform lets you change your departure times multiple times without extra charges as long as the train has not left.
Understanding the High Speed Rail System
Traveling across the ocean to a new country brings a lot of excitement, but figuring out transport can feel overwhelming. The fast trains in Japan are famous for being on time, clean, and incredibly fast. They connect major cities like Tokyo, Kyoto, Osaka, and Hiroshima in just a few hours. To make your trip smooth, buying your travel passes early is a smart move.
The official platform for booking these fast trains is a service that lets you buy tickets through a website or a smartphone app. Using this system while you are still sitting at home in the United States helps you plan your days without stressing about language barriers or full trains later.
What is the Official Reservation Platform?
The booking platform is a digital service created by the rail companies that manage the main tracks running from Tokyo down to the southern regions. It is designed for visitors who want a direct way to pick their own cars, choose exact seats, and pay the exact standard price without middleman fees.
You can access the platform through any web browser or by downloading the dedicated smartphone application from your digital store. The system operates entirely in English and allows you to look at active timetables, check seat charts, and handle payments using your standard credit cards.
Why Booking Early From Home is Best
Waiting until you land to figure out your train travel can lead to unnecessary stress. Station ticket offices often have long lines of travelers, and popular departure times can sell out days in advance. This is especially true during morning rush hours or major vacation seasons.
By using the online platform before your flight leaves, you lock in your travel times. You also get access to special early-booking discounts that are only available when you buy your tickets several days or weeks before your actual travel day.
Covered Rail Routes and Regions
The platform does not cover every single train track across the island nation, but it handles the most famous and heavily traveled path. This path connects the capital city to the cultural hubs and southern coastlines.
The service covers three connected rail networks: the Tokaido line, the Sanyo line, and the Kyushu line. If your travel plans include moving between Tokyo, Nagoya, Kyoto, Osaka, Hiroshima, or Fukuoka, this specific platform is exactly what you need to use.
Creating Your Account Step by Step
Before you can search for trains or purchase seats, you must set up a personal profile on the system. Doing this while you are still at home gives you plenty of time to solve any verification issues with your bank.
The registration process requires a valid email address, a secure password, and a compatible payment method. Setting up the profile takes only a few minutes when you follow the right order of actions.
Entering Personal Details
Start by visiting the official registration page or opening the app on your phone. You will need to input your full legal name exactly as it appears on your travel documents and your primary email address.
The system will send a digital confirmation link to your email inbox immediately. You must open that message and click the validation link within a short window of time to verify that your email address is correct and active.
Setting Up a Secure Password
Once your email is verified, the system will ask you to create a secure password. The password rules require a specific mix of letters and numbers to protect your personal information and financial details.
Make sure to write down your username and password in a safe place. The system will also assign you a unique ten-digit identification number that you will use to log into your account in the future instead of your email address.
Adding Your Payment Information
The final step of the profile setup is registering a credit card. The system accepts major international networks including Visa, Mastercard, American Express, Diners Club, and Discover.
The cardholder name you type into the form must match the physical card perfectly. If your name contains hyphens or periods, replace the hyphens with a blank space and leave the periods out entirely so the system does not trigger an error message.
Navigating the Credit Card Verification Hurdle
The most common issue travelers from the United States face when using this platform is getting their credit cards approved. The system uses top-level security protocols to stop digital fraud, which can sometimes block legitimate foreign transactions.
Understanding how the security system works and knowing how to prepare your bank account will save you from frustration during the payment stage.
The Role of Three Dimensional Secure Authentication
The booking platform requires all registered cards to support a security system known as 3D Secure. This protocol adds an extra layer of verification by redirecting you to your bank’s safety page to confirm that you are the actual person making the purchase.
When you submit a payment, your bank might text a temporary code to your mobile phone or send a notification to your bank’s smartphone app. You must enter this code into the booking screen to finalize the registration or purchase.
Tips for Getting US Cards Approved
Many banks in the United States automatically block overseas transactions if they look unusual. To prevent this, call your credit card company before you start the registration process and let them know you will be making purchases on a Japanese travel website.
If your primary card fails, try using a different brand. Many travelers find that American Express and Mastercard tend to pass through the security checks more consistently than standard Visa cards on this specific system.
Alternative Cards and Solutions
If you attempt to register multiple cards and they all get rejected, look into specialized travel credit cards or digital cards that offer temporary numbers. Some premium cards have dedicated fraud departments that can manually clear the path for your transaction while you are on the phone with them.
Another option is to try the registration process using a desktop computer instead of a mobile device, or vice versa. Sometimes browser security extensions or pop-up blockers interfere with the bank authentication screen, causing the transaction to fail.
Choosing Your Train and Class of Service
Once your profile is fully active and your card is linked, you can begin exploring the actual train schedules. The system offers several types of trains and multiple seating options tailored to different budgets and comfort levels.
Knowing the differences between the train categories ensures that you select the fastest and most convenient option for your journey.
Fast vs Moderate Train Types
The rail line features different train models that run at varying speeds based on how many stops they make along the way. The fastest model is called the Nozomi, which skips smaller stations and gets you from Tokyo to Kyoto in roughly two hours and fifteen minutes.
Other train types include the Hikari and the Kodama. The Hikari makes a few more stops along the route, while the Kodama stops at every single station on the line, making it a much slower choice for long-distance travel.
Ordinary Car Options
The regular section of the train is known as the Ordinary Car. This is the standard economy option, offering comfortable seats arranged in rows of five, with three seats on one side of the aisle and two on the other.
Within the Ordinary Car section, you can choose between reserved seats and non-reserved seats. A reserved seat ensures that a specific spot is held under your name, while a non-reserved ticket allows you to sit anywhere in designated cars on a first-come, first-served basis.
The Premium Green Car Experience
If you want extra legroom and a quieter environment, you can upgrade to the Green Car, which is the equivalent of first-class seating. These cars feature larger, plush seats arranged in rows of four, with two seats on each side of the aisle.
The Green Car offers extra amenities like footrests, personal reading lights, and individual power outlets for your electronic devices. This section requires a mandatory seat reservation and provides a more relaxing atmosphere for long journeys.
Booking the Ticket Online
When you are ready to make a purchase, the process involves selecting your travel dates, choosing your stations, and picking your exact seats on the digital map. The system allows you to buy tickets up to one full year before your departure date.
Taking your time during this step ensures that you get the exact seats you want, including sides of the train that feature scenic views.
Inputting Dates and Station Names
Log into your account using your ten-digit ID and password, then select the option to search for a train. Enter your departure date, your preferred travel time, and your starting and ending stations.
When typing station names, make sure to use the exact central station terms. For example, if you are traveling to Osaka, use the station name Shin-Osaka, as that is the specific terminal where the high-speed rail lines stop.
Reading the Train Schedule Screen
The search results will show a chronological list of available trains. Each listing includes the train number, the specific model name, the exact departure and arrival times, and the total travel duration.
Icons next to each train will display seat availability using simple symbols. A circle means plenty of seats are open, a triangle means only a few spots remain, and an “X” indicates that the train is completely full.
Utilizing the Interactive Seat Map
After selecting your train and fare type, the system will allow you to open a digital map of the train cars. This feature lets you look at every open seat so you can pick your exact spot.
If you are traveling with family or friends, the map makes it simple to select seats that are directly next to each other. You can also see where the restrooms and luggage storage areas are located inside each car.
The Oversized Luggage Rule
The rail companies enforce specific rules regarding the size of suitcases you can bring onto the train. If you are traveling from the United States with large bags, you must understand these limits to avoid extra fees and hassles at the platform.
The system requires passengers with extra-large bags to reserve special seats that feature dedicated storage space directly behind the last row of the car.
Measuring Your Bags Correctly
The rule is based on the total combined dimensions of your suitcase, which means adding the length, width, and height together including the wheels and handles.
Bags that measure between 160 centimeters and 250 centimeters in total dimensions fall into the oversized category. If your suitcase fits this description, you are required by law to book a ticket that includes a dedicated luggage reservation.
Selecting the Special Luggage Seat
When you are booking your ticket on the app or website, look for the specific seating option labeled “Seat with an Oversized Baggage Area” or “Seat with an Oversized Baggage Compartment.”
Choosing this option does not cost any extra money, but the number of these specific seats is limited on each train. Booking early ensures that you secure one of these spots so you do not have to leave your large bags behind or pay a penalty fine at the gate.
What Happens If You Ignore the Rule
If you board the train with an oversized suitcase without having the proper reservation, the train crew will ask you to move your bag to a secure area and you will be charged a cash penalty fee.
Bags that measure under 160 total centimeters do not require any special booking. They can easily fit on the overhead racks above your seat, which are spacious and sturdy enough to hold standard carry-on suitcases.
Securing the Best Views and Seats
Part of the joy of train travel is watching the beautiful scenery roll past your window. With a little bit of planning during the seat selection process, you can position yourself for some unforgettable views during your ride.
The most famous sight along the main line is Mount Fuji, and knowing which side of the train to sit on makes all the difference.
Catching a View of Mount Fuji
If you are traveling south from Tokyo toward Kyoto and Osaka, the iconic mountain will appear on the right side of the train about forty-five minutes into the journey.
To secure a window seat with this view, look at the seat map and select a seat in row “E” in a standard car, or row “D” if you are traveling in a premium Green Car. If you are traveling in the opposite direction from Kyoto back to Tokyo, you will want to select a seat on the left side, which corresponds to row “A.”
Choosing Between Window and Aisle
Window seats are fantastic for enjoying the countryside views and having a solid wall to rest your head against if you want to nap. They also give you direct control over the window shade.
Aisle seats are ideal if you like to get up frequently to use the restroom, stretch your legs, or access your large luggage without disturbing the person sitting next to you. The aisles are wide enough that passengers walking past will not bump into your shoulders.
Best Sections for a Quiet Ride
The cars located in the middle of the train tend to offer the smoothest and quietest rides because they are furthest away from the locomotive engines and the platform traffic.
If you prefer a calm environment, avoid booking seats that are directly next to the sliding entry doors or the restroom stalls, as those areas experience constant foot traffic and noise throughout the trip.
Ticket Collection and Digital Entry Methods
Once your purchase is complete, you do not need to worry about printing physical papers before you leave the United States. The platform offers multiple modern ways to pass through the station gates using your digital devices.
Understanding how to set up these entry methods before you arrive at the terminal ensures a smooth transition from the airport to the train platform.
Using the Digital Barcode System
The simplest entry method is utilizing the digital barcode generated by the app after your purchase is confirmed. You can view this barcode directly on your smartphone screen.
When you arrive at the high-speed rail gates, you simply hold your phone screen over the glowing glass scanner built into the turnstile. The gate will read the code, print out a small paper slip showing your seat assignment, and open the doors for you.
Linking to a Local Transit Card
If you plan to use a local rechargeable transit card like a Suica or Pasmo during your vacation, you can link that physical or digital card directly to your train booking platform profile.
By entering the unique card number into your app account, your train ticket loads onto your transit card. When you walk through the station gates, you just tap your transit card or your Apple Wallet over the scanner, making the entry process incredibly fast.
Picking Up Physical Paper Tickets
If you prefer to have standard paper tickets, or if your phone battery dies, you can easily print your physical passes at the station using the automated vending machines.
You will need to select the internet reservation pickup option on the machine screen, scan the specific barcode provided in your confirmation email, and enter the personal login password you created during your account setup.
Managing Changes and Cancellations
Travel plans can change unexpectedly due to flight delays, weather issues, or shifts in your daily itinerary. One of the greatest benefits of using this official platform is the immense flexibility it offers for modifications.
Knowing how to adjust your bookings on the fly keeps you in control of your vacation timeline without losing your money.
Making Unlimited Schedule Changes
The system allows you to change the date, departure time, and seat selection of your booked train as many times as you want without paying any penalty fees.
You can make these changes directly through the app or website right up until four minutes before the train is scheduled to leave the station. This feature is incredibly helpful if you realize you need a few extra hours to explore a city before moving on to your next destination.
Understanding the Cancellation Policy
If your travel plans fall through completely and you need to cancel your trip, you can request a full refund through the online portal.
A small, standard processing fee is deducted for each ticket you cancel, but the remaining balance is credited back to the registered credit card automatically. The refund process must be initiated before the train departs its origin station.
Handling Delayed Flights and Missed Trains
If your flight from the United States lands late and you miss the specific train you reserved, your ticket does not become completely worthless.
Your reserved ticket automatically converts into a non-reserved ticket for the exact same route on that same calendar day. You can board any later train heading to your destination and sit in the non-reserved cars without paying extra.
Comparing Your Booking Options
While the online platform is highly recommended, it helps to understand how it compares to other traditional ways of buying train tickets. This overview shows why the direct digital method is the top choice for modern travelers.
Summary of Booking Methods
| Booking Method | Purchase Location | Timing | Main Advantage |
| Official Online Platform | Anywhere with internet | Up to 1 year early | Secure exact seats and early discounts |
| Station Vending Machine | At the train terminal | Day of travel | Cash payment option |
| Manned Ticket Office | Inside major stations | Day of travel | Face-to-face assistance |
| Third-Party Agency | Online websites | Months early | Accepts all international cards easily |
Direct Platform vs Station Ticket Offices
Buying your passes through the official app means you never have to waste your precious vacation hours standing in long lines inside crowded train stations.
Station offices are excellent if you need to pay with physical cash, but the staff may speak limited English, and the language barrier can make picking specific seats or understanding luggage rules difficult.
Direct Booking vs Third Party Websites
Third-party travel agencies offer convenience and sometimes bypass credit card security issues, but they always add extra service fees on top of the actual ticket price.
Using the official platform ensures you pay the exact standard fare regulated by the rail network. It also gives you instant power to change your seat or train time directly through your phone without waiting for an agency to process your request.
Step by Step Buying Sequence
When you are ready to make your first purchase, following a strict sequence ensures that no steps are missed and your seats are successfully locked in.
The Complete Purchasing Process
- Log In: Open the app or website and enter your unique ten-digit membership identification number and your secure password.
- Search Route: Input your starting terminal, your destination station, your travel date, and your ideal departure time window.
- Select Train: Look through the chronological list of options and pick the train model that fits your schedule, keeping an eye on the seat availability icons.
- Choose Fare Type: Select whether you want a standard Ordinary Car reserved seat, a non-reserved ticket, or a premium Green Car spot.
- Declare Luggage: Choose the specific oversized luggage seat option if you are traveling with large suitcases that exceed 160 total centimeters.
- Pick Seats: Open the interactive cabin map, look for your preferred row, and select your exact seats.
- Review Summary: Double-check the date, train number, departure times, and total price on the final confirmation screen.
- Finalize Payment: Click the purchase button to trigger the bank security verification screen, enter your security code, and wait for the confirmation email.
Frequently Asked Questions
Can I book tickets for my entire family using a single account?
Yes, you can purchase tickets for up to six passengers at the exact same time using one single profile. During the search process, you simply select the total number of adults and children traveling with you. The system will let you select multiple seats together on the interactive map, and all the digital entry barcodes will be stored inside your single app for easy scanning at the station gates.
What should I do if the app says my credit card is invalid during registration?
If your card is rejected, the first step is to call your bank to ensure they are not blocking the platform for fraud prevention. If the issue continues, try registering a card from a different network, such as American Express, which tends to have high success rates. You can also try completing the setup process on a desktop computer browser instead of the mobile app, ensuring all pop-up blockers are turned off.
Is it necessary to print out physical paper tickets before leaving home?
No, there is no need to print anything on paper before you depart the United States. The entire system is completely digital. Once you complete your purchase, you can use the electronic barcodes displayed on your smartphone screen to pass through the station turnstiles. If you prefer physical tickets for your records, you can print them out easily at any automated station machine once you arrive in Japan.
How early should I arrive at the train station on my travel day?
Because you already hold your digital tickets and have your seats assigned, you do not need to arrive hours early like you would for an airplane flight. Arriving roughly twenty to thirty minutes before your scheduled departure time is usually plenty. This gives you enough time to find the correct platform, buy some snacks or a lunch box at the station shops, and locate your specific car boarding line on the ground.
Can I change my train time if I get stuck in traffic on the way to the station?
Yes, the platform gives you incredible flexibility to adjust your travel times. You can open the app on your phone and change your departure time to a later train for free, right up until four minutes before your original train leaves. If you miss the train completely before you have a chance to change it online, your ticket remains valid for any later train on that exact same day as a non-reserved seat ticket.